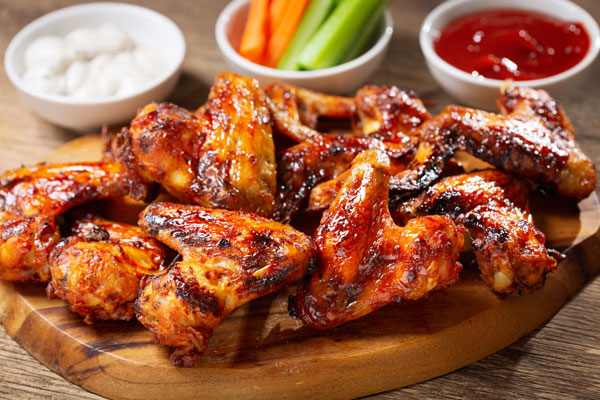
Classic Buffalo Chicken Wings
Wilsons Sauce Co. Classic Buffalo Chicken Wings recipe is a favorite for wing fans. It has all the flavor, and it's full of flavor. No Extra Sauce Needed! This will surely be a favorite for your friends and family for many gamedays to come. Did we mention already that this is a Keto-Friendly Buffalo Wing Recipe?
Ingredients: Wilson's Buffalo Sauce, and Wilson's Buffalo Seasoning Dry Rub
Ingredients
Equipment
Ninja Foodi Chicken Wings
One of our classic family recipes is our finger-lickin' buffalo chicken wings. Since we invented our sauce in 2021, we've been looking for healthy ways to eat the classic game-day foods we're all accustomed to. And folks, here it is. You don't need a Ninja Foodi 14-i-n1 8qt Cooker but let us say, this thing is nice and you can buy one on amazon. We cook these in the Pressure Cooker until tender, and then coat them with our Buffalo Wing Sauce. These are the perfect party appetizer on game day or American holidays.
With this easy buffalo chicken wing recipe we're gonna teach you how to quickly cook chicken wings in a pressure cooker or Instant Pot. We'll even teach you to learn how to make the best wings made from scratch.
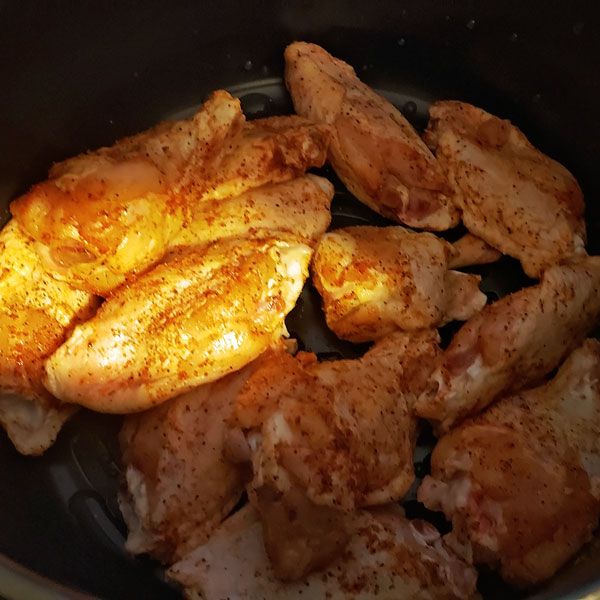
How to season your wings with dry rub
Step 1. Season your wings with dry rub
- Pat the chicken wings dry with paper towels.
- In a large bowl, add chicken wings, and the buffalo wing dry rub.
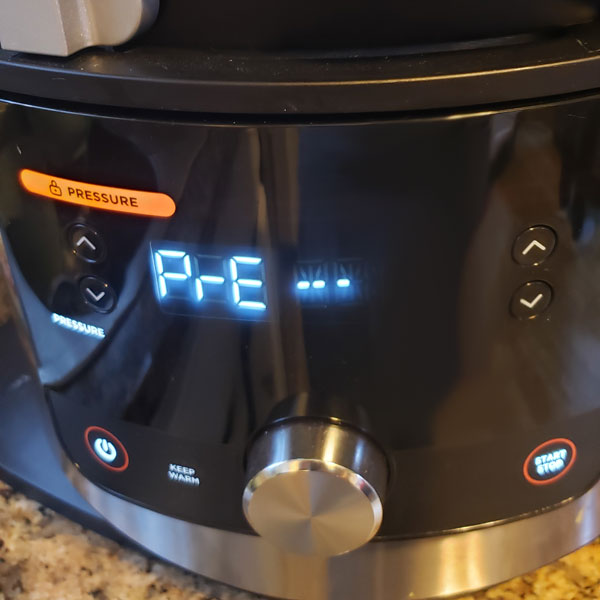
How to cook Buffalo Chicken Wings in a Pressure Cooker
Step 2. Pressure Cook the Chicken Wings
- Add 1 cup of water into the pot.
- Place the Rack or Steamer Basket in the pot.
- Place the chicken wings in the basket (you can pile on top of each other)
- Secure the lid and cook on Manual for 5 Minutes. When the timer goes off, let the pressure release naturally for 10 minutes.
What is a Natural Release for Pressure Cookers?
In the Pressure cooker world, to naturally release the pressure means to let it stand for a certain amount of time to let the cooker cool down, and naturally, let the pressure go back to normal. Make sure that you press the stop button after cooking to start the natural release.
How to crisp Chicken Wings with an Air Fryer
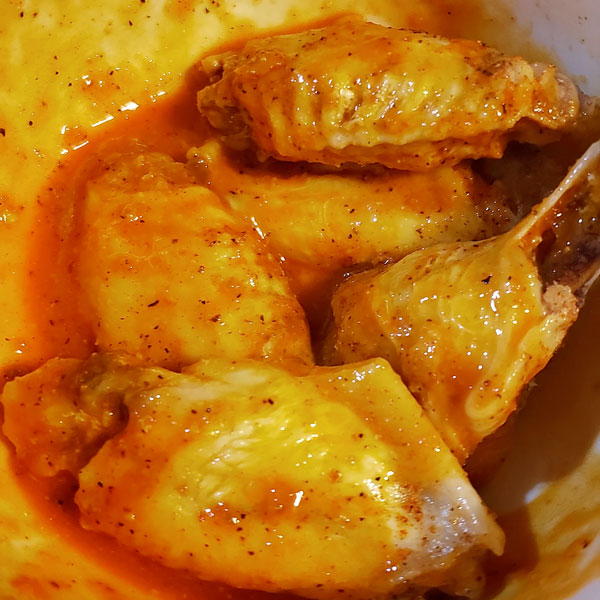
Step 3. Add sauce to your Chicken Wings
- Put the cooked chicken wings into a large bowl. Add Buffalo Sauce. Toss to coat.
Step 4. Make the Chicken Wings Crispy (with Ninja Foodi Air Crisp, or Air Fryer)
- Transfer the coated seasoned chicken wings into the Ninja Foodi Basket or Rack
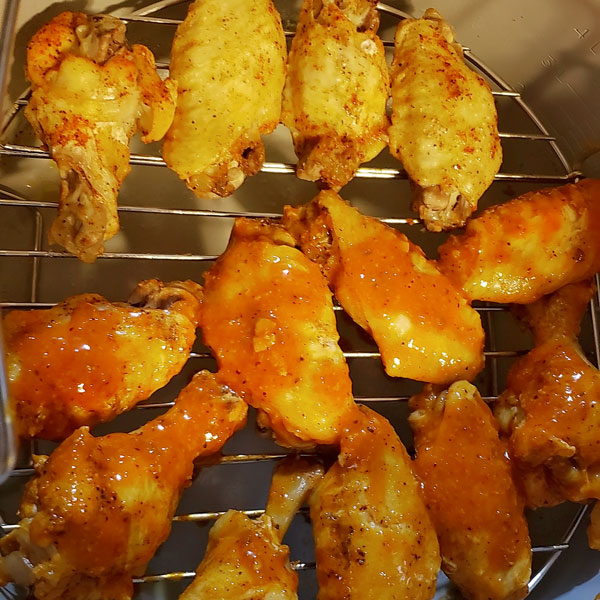
Step 4. Air Fry Chicken Wings
- Select AIR CRISP, and set the temperature to 390°F and set the time to 15 minutes.
- Press the START/STOP button to begin.
- Every 3-5 Minutes, simply open the lid to check for your desired crispness of your wings. (Don't Worry the unit will stop while the lid is open)
- Remove from the oven and pour the remaining sauce over the wings before serving, toss to coat and ENJOY!
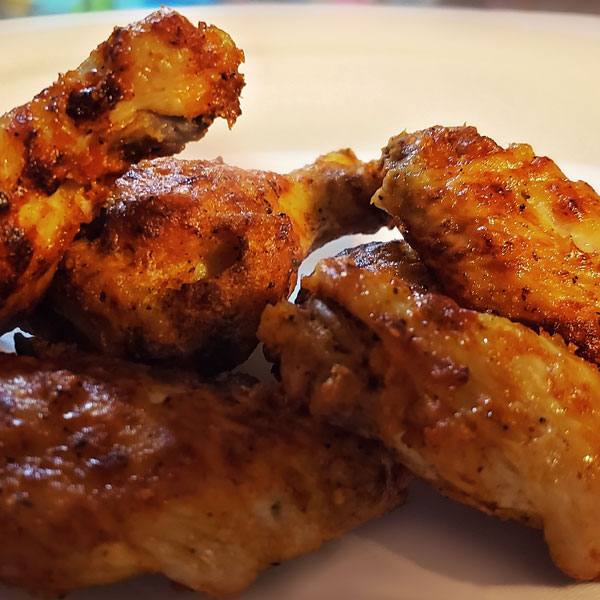
The Perfect Chicken Wings
Step 5. Coat and Enjoy!
- Remove from the oven and pour the remaining sauce over the wings before serving, toss to coat and ENJOY!